Italian Cheese Balls

So, today I was procrastinating again. The first part of my procrastination was to watch a movie. About 3 minutes into the movie, I decided that I wanted to bake something, so I procrastinated my procrastination activity; kind of like inception I guess.

This recipe is actually a twist on Sorted Food’s Cheesy Bites which I’ve made a few times. The original recipe calls for no baking powder/bicarb of soda, which makes the final product slightly too dense for my liking. Also, I found the poppy seeds to be slightly distracting from the cheeses. I made a few tweaks on the original recipe, to adjust the texture to my liking, and also I used some Italian flavours. Instead of the poppy seeds I decided to sprinkle the cheese balls with some good coarse sea salt.  Moreover, I made a few changes in the execution to speed up the process; with a food processor in the kitchen you can make these in 20-25 minutes start to finish. The recipe makes about 16 balls.

Italian Cheese Balls

Italian Cheese Balls

Ingredients

  • 175g self-raising flour
  • 125g cold (salted) butter
  • 1/2 tsp salt
  • 1/2 tsp mustard powder
  • 1 tsp oregano
  • 1/2 tsp black pepper
  • 75g grated mozzarella
  • 50g piece parmesan
  • 1 egg
  • 1-2 tbsp milk
  • a few pinches of coarse sea salt for garnish

Execution

  1. Preheat the oven to 190C (very important).
  2. Add the flour and butter in a food processor and mix for 5-10sec, or until the butter disappears.
  3. Add the parmesan chunk and pulse until breaks into small pieces; you should still be able to see the pieces.
  4. Tip the mixture in a large bowl, add the rest of the ingredients (apart from the sea salt; that’s for garnish) and mix until combined.
  5. Line a baking sheet with greaseproof paper.
  6. Form the dough balls to approximately the size of a golf ball and place on the baking sheet, making sure to leave at least 2-3cm of space between each ball. If you can’t fit them all at once without overcrowding the sheet, just do them in batches.
  7. Sprinkle over the sea salt.
  8. Bake for 15 mins.
  9. Enjoy!

Tips

  • You can obviously mix and match different cheeses and spices. A cheese with chilli pieces in it would be a nice alternative with a kick 😉 .
  • If you’re definitely serving them hot, you may want to add a piece of cheese in the middle of each ball, for a molten cheese centre.
  • If the dough is getting too sticky put the mixture in the fridge and/or dust your hands with flour while handling. You may also want to keep the dough cold if you are baking several batches.

Piri-piri Marinade

In case you haven’t noticed from my posts, I just can’t get enough chilli in my food. I’m in love with the heat, since it makes eating more exciting. In this post, I’ll be sharing one of my all time favourite marinades for chicken. Piri-piri, is a type of African chilli, which also has a sauce made after it. The sauce itself has Portuguese roots and has become quite popular all over the world. Just to be blunt about it, a variation of it is served at Nando’s and I like it!

Since I like this marinade so much, I decided to create my own variation to it. Mind that I couldn’t find piri-piri chillies, so I adjusted it accordingly. By all means, if you can get these chillies where you live, just use them. The last time I made this marinade I used it on a chicken supreme or, in plain English, chicken breast with the skin and wing still attached. I don’t know if you can get this from a supermarket. I personally bought a few weeks ago a whole chicken, portioned it up on my own and stashed it in the freezer. Apart from being cheaper, I actually enjoy butchering  🙂 .

Anyway, enough with my butchering fetishes. Here’s the recipe!

"Piri-piri" chicken

“Piri-piri” Marinade

Ingredients

  • 30ml red wine vinegar
  • 30ml extra virgin olive oil
  • 1 red chilli
  • 3 finger chillis
  • 1 clove garlic
  • 1 tsp salt
  • 1 tsp oregano
  • 1/2 tsp paprika
  • 1/2 tsp rosemary
  • 1/2 tsp black pepper

Execution

  1. Chuck everything in a blender, or food processor and blend. Alternatively, use a pestle and mortar. That’s all.

Tips:

  • If you don’t have a food processor/blender/pestle and mortar, you can finely chop the chillies and grate the garlic and stir all the ingredients in a bowl. It won’t be exactly the same, but it’ll still be damn tasty.
  • Ideally, you want to marinade your chicken overnight. When I was cooking the chicken breast in the picture it was a last minute idea, so I only marinaded it for about an hour. It was still really tasty, so don’t feel obliged to make too much preparation!
  • I find that the best way to marinade meats is using a zip-top bag. Just put the  meats in with your marinade, seal it almost all the way, push the air out and then seal completely. Needless to say, marinade in the fridge!
  • Of course, you can adjust the amount of chillies depending on your taste. This version is quite spicy. To make it less spicy you can remove the seeds from the chillies, or use other milder varieties, such as jalapenos. If you want it even less spicy, use a relatively mild chilli variety, first roast the chillies and then remove the seeds. Roasting the chillies should get rid of some of the heat and bring out the sweetness of the pepper.
  • The side in the back of the picture is potatoes that I have boiled and then sauteed with some paprika, garlic and mushrooms.

Stuffed Dumpling Squash with Pumpkin Spice Chickpeas

I usually buy my vegetables from an online shop that has the option to send you a box with whatever vegetables are currently in season. A couple of weeks ago I got one of these vegetable boxes and one of the contents was a dumpling squash, which is basically like a mini pumpkin. I knew I wanted to stuff it with something, just because it just looks amazing as a serving vessel.

The first possibility I considered was to take the flesh out, make a soup out of it and put it back in. I also considered making a curry, since pumpkin and squash work quite well with these flavours. Finally, I got some inspiration from the pumpkin spice mania of this time of year and decided to make something similar to a curry, but use a pumpkin spice base instead of a curry spice mix. Long story short, I decided to make a chicken and chickpea pumpkin spice filling, and use the squash as and edible bowl.

Stuffed Dumpling squash

Stuffed Dumpling Squash with Pumpkin Spice Chickpeas

Ingredients

  • 2 Dumpling Squash
  • 400g tin chickpeas
  • 2 chicken thigh fillets, diced to 1/2″ pieces
  • 1 medium onion, sliced
  • 2 cloves garlic, minced
  • 1 thumb size piece of ginger, grated
  • 1 red chilli, deseeded and finely chopped
  • 1 tbsp olive oil
  • 1/2 cup chicken stock
  • 5 cherry tomatoes (roughly chopped)
  • 2 tsp pumpkin spice (see tips)
  • Coriander (or cilantro in US English) leaves and chilli to garnish

Execution

  1. Preheat the oven to 180C.
  2. Cut the top off the squashes, and use a spoon to scoop out all the seeds (there should be plenty of YouTube videos about carving a pumpkin, it’s the same procedure).
  3. Season the squashes with salt and about 1/4 tsp of the pumpkin spice per pumpkin and bake for about 25-30 minutes, or until you can relatively easily cut through the flesh with a spoon.
  4. While the squash is baking, prepare the filling. In a pan, add the olive oil, onions, chilli and ginger and set over a medium-high heat. Using a bit of salt here helps speed up the process.
  5. When the onions soften add the pumpkin spice and stir around for about a minute.
  6. Add the chicken and the garlic.
  7. Stir around for 3-5 minutes, add the chickpeas, tomatoes and stir.
  8. Add the chicken stock and let it simmer, stirring occasionally until the liquid disappears; be careful not to burn it. Taste and adjust for salt and take it off the heat.
  9. At this point, the squash should be ready to stuff. Take it out of the oven, fill it with the chickpeas, garnish with some coriander leaves and chilli slices and serve.

Tips:

  • You can either buy pumpkin spice from the supermarket, or go hardcore and make your own. There are plenty of recipes online for this; personally I used 5 cloves, 1 cinnamon stick and 1/2 tsp allspice.
  • You can optionally scoop out the squash flesh after baking it and add it to the stuffing. I just liked the idea of scooping the flesh out while I was eating it, so I left it in.
  • If you’re not serving straight away, stuff the squash, put  the lid on top and put it in the oven after you turned it off. It should keep them warm for an hour or so.

Asian Spicy Chicken Wings

It’s been a while since my last post. I’d say that I was busy, but the truth is that I was procrastinating too much. After being told off by a few friends for not posting any more, I decided to make my comeback with chicken wings, since they’re my favourite part of the bird.

I know that there are many cooking methods for chicken wings. Some people deep fry chicken wings, others bake them, steam them etc. Personally, I prefer to bake them in two stages. First, I bake them at 180C for 25-30 mins and then I apply whatever glaze I want and bake them at 250C, or as high as the oven goes, for another 5 minutes or until the glaze caramelises.

Most people bake wings on regular baking trays. This has a few problems: the chicken wings tend to stick to the pan and they boil in their own juices, making the skin soggy. I found that the best way to bake chicken wings is on the wire rack over a roasting tray,  which usually comes with the oven.

I couldn’t decide whether to do a Korean glaze, or go down the Japanese route and make teriyaki. I decided to do something in between and here’s the result:

Asian Chicken Wings

Asian Spicy Chicken Wings

Ingredients

For the glaze

  • 1 thumb size piece of ginger, thinly sliced
  • 1 cinnamon stick
  • 2 star anise
  • 4 cloves
  • 2 red  chillis, seeds removed, roughly chopped
  • 1 clove garlic, crushed
  • 2 tbsp soft brown sugar
  • 2 tbsp rice wine vinegar
  • 2 tbsp dark soy sauce
  • 4 tbsp water
  • salt

For the wings:

  • 700g chicken wings
  • 1 tsp Chinese fivespice
  • 1 tbsp vegetable oil
  • sesame seeds (optional)
  • salt

Execution

  1. Start by preheating the oven to 180C.
  2. In a sauce pan, put all the glaze ingredients, bring to a boil and simmer for 30 minutes (or until the wings are done).
  3. Line the baking tray with tinfoil or greaseproof paper to avoid too much smoke (and reduce washing up!), place the wire rack on top and wipe the rack with kitchen paper dipped in vegetable oil.
  4. Meanwhile, put the chicken in a bowl with the vegetable oil, five spice and salt. Mix until the fivespice has been distributed to all the wings.
  5. Place the chicken wings on the rack and bake for 25-30 minutes. Make sure the rack is not overcrowded with wings; ideally the wings shouldn’t be touching. This helps the skin fat to render out so that you don’t get soggy skin.
  6. Take the wings out of the oven, and turn the oven temperature up to the maximum.
  7. Sieve the glaze in a bowl and add the chicken. Mix occasionally every minute or so, until the oven has reached its temperature (there’s usually a light indicator on the oven door that goes off when it reaches the temperature you specified).
  8. Put the wings back on to the rack and bake for a further 5-8 minutes, or until you start seeing dark brown/black-ish spots on the wings.
  9. Sprinkle with the sesame seeds and enjoy!

Tips:

  • It is important that the wings are dry when you first bake them in the oven. Before starting to work with the wings, I recommend you pat them dry with kitchen paper. This helps the skin to become less soggy.
  • You may use the glaze ingredients as a marinade for the wings. Just make sure you pat them dry before baking! Just simmer the marinade as described in the recipe to slightly thicken it to a glaze.
  • For a deeper flavour, you can use toasted sesame oil instead of vegetable oil to toss the wings.
  • The salad’s in the background is just red pepper, Chinese leaf, salt, rice wine vinegar and sesame oil.

Plum glazed pork ribs


About a week ago I was given a bit more than 1.5Kg of very ripe plums (thanks Sam!), so that they wouldn’t be just thrown away. After changing my mind about 5-10 times I decided to make a Chinese plum sauce. The reason I made the plum sauce is that I could put it in a (sterilised) jar and keep it for a month or two. The obvious use for it would be to use it as a dip for duck, but as usual I like to think out of the box and try new things.  The sauce is basically made of the fruit, vinegar, sugar and aromatics, which sounds like an awful lot like a barbecue sauce, so I decided to use it as a glaze for pork ribs.

The recipe procedure is very similar to my spicy ribs, but with some Asian flavours instead. I won’t start mumbling about science stuff, as I usually do. Let’s just go straight to the recipe.

Plum Glazed Rack of Ribs

Ingredients

  • 1 rack of pork ribs
  • 3 tbsp vegetable oil
  • 1 chilli (I used Serrano)
  • 1 tbsp grated ginger
  • 1 clove garlic
  • 3 tbsp vinegar (I used sherry)
  • 3 tbsp Chinese plum sauce
  • 1/2 tsp Chinese fivespice
  • Coriander (aka cilantro) for garnish
  • Salt, pepper

Execution

  1. Start with the rub. Put in a blender or pestle and mortar the oil, chilli, ginger, fivespice and garlic. Blend/mash well. If you don’t have a blender or pestle and mortar just finely chop everything.
  2. Rub the ribs with the mixture, wrap with aluminum foil, leaving one end open. Pour in the vinegar and seal. Make sure that the ribs are not wrapped to tightly, so that you can allow the steam to build up.
  3. Put in a 160C preheated oven for 1h30m.
  4. Optionally, leave them in the oven until cool enough to handle. This makes them super tender; you will literally need to be careful handling them afterwards or they’ll fall apart.
  5. Take them out of the oven and unwrap. (make sure you keep the juices… they’re too delicious to waste – see tips for idea on how to use them)
  6. Turn your oven grill to its highest setting and let it get really hot.
  7. Meanwhile spoon over the ribs the plum sauce and put under the grill, as close as possible) until it starts getting caramelised. Be careful not to burn them… this only takes about 3-5 minutes so keep an eye on them.
  8. Garnish with fresh coriander/cilantro leaves and enjoy!

Image

Tips:

  • You can use the meat juices to dress a side salad, noodles or sautee potatoes, which you’ve previously boiled. As you can see from the picture I used it to dress some rice noodles.
  • If you own a blow torch use it to caramelise the ribs instead of the oven grill. It will do a better job and it’s easier to control; I need to get myself one of these.

Veggie-spiked turkey lasagne

The other day I went to do my much needed grocery shopping and saw that they had turkey leg packs (thigh and drumstick) on offer; £3 for 1.6Kg of turkey goodness. I went ahead and bought a pack, since I like turkey (if done properly and not turned into rubber). Anyway, I bought quite a few stuff I’m probably never going to use and started wondering what to do with my newly acquired bird parts. That thigh was HUGE!

When I see good but cheap ingredients I think about the good old comfort food and family style dinners. Being out of my mind, the first thing that I thought of was turkey lasagne! Making lasagne implied that I’d need to do some butchering (skinning, de-boning and mincing), which I find disturbingly therapeutic. For most applications I prefer making my own minced meat in the food processor, since it is easy and most importantly you know what goes in it! (Plus it’s an excuse to play with my kitchen gadgets 😀 ). Another good thing about lasagne is that you can spike them with veggies; kids won’t even know they’re there!! Personally, I don’t care about that; I just had some carrots and celery that I need to get rid of soon. Also, I love smoked turkey, but for some reason it is near impossible to find in the UK, so I decided to give that feel to my lasagne by adding some spicy smoked chorizo. Italians are probably going to have a heart attack when they see me using a spanish sausage in lasagne; I don’t care, I like it, it works so I use it! 😀

You didn’t think that I wouldn’t talk about science, did you? Most people associate turkey as being tough and dry. That’s partly true, if you don’t cook it properly. Meat is basically protein fibres (muscle), fat and water. The protein is what holds the meat together and used to do all the work  when the animal was alive, hence it is strong stuff by nature, which is what you percieve as tough. When people say that their turkey turns out dry is basically because it was not cooked properly. Dry meat is because of too much moisture and water loss during the cooking process.Turkey is extremely lean, so the only thing that prevents it from being dry is the water trapped in the protein fibres. If you heat these fibres too aggressively they contract, denature, squeezing out all the water and toughening up. There are three basic approaches to solve this:

  1. The low and slow method. This way you gently heat the proteins to the point that the proteins start breaking down into other compounds that are both tastier and softer.
  2. Brining. If you submerge any meat in a salt-water solution you force moisture into the meat via osmosis and the protein structure is altered, making the meat hold onto moisture better. Brining and then cooking low and slow will give you the juiciest meat.
  3. Cut the fibres so you don’t have to bite into them! That’s the technique I’m using for the lasagne. Mincing the meat will ensure that there are no long muscle fibres to bite into, therefore making the meat tender.

Science is over. It’s recipe time!

Veggie-spiked turkey lasagne

Ingredients

For the cheese sauce:

  • 3 tbsp olive oil
  • 3 tbsp plain flour
  • 650g hot milk
  • 1 mozzarella ball
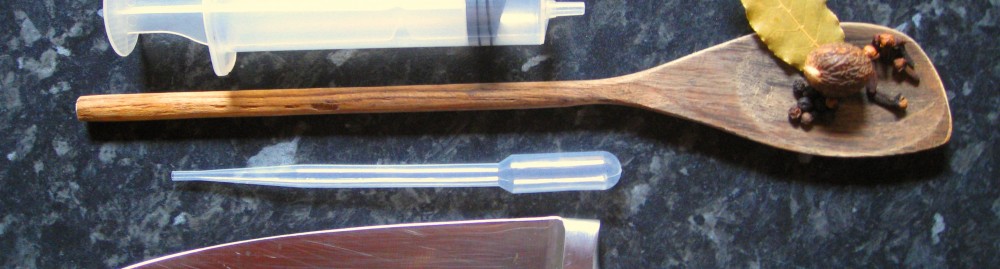
  • 1/4 tsp freshly ground nutmeg
  • salt,pepper

For the turkey ragù:

  • 1 large onion
  • 1 celery stalk
  • 1 carrot
  • 1 clove garlic
  • 10-15 cm piece of chorizo (diced)
  • 1/2 tsp cinnamon
  • 1/2 tsp paprika
  • 1 bay leaf
  • 1/2 tsp oregano
  • 400g  tinned chopped tomatoes
  • 800g turkey mince
  • optional: the skin from the turkey
  • 100ml white wine

Pasta:

  • lasagne (about 250g should do; this depends on your pan, number of layers etc.)

Execution:

  1. Turn the oven on at 180C and start with the ragù. Put the chorizo (and turkey skin in a dry cold pan) and turn it on to medium.
  2. Meanwhile, roughly chop all your veggies (onion, garlic, celery, carrot) and put them in a food processor. Pulse until finely chopped (or if you have to do with picky eaters blitz it until it turns into a sludge – no veggie evidence for kids to fuss about).
  3. When the chorizo starts getting some colour get rid of the turkey skin and dump in the pan the contents of the food processor and the bay leaf. Sauté for 5 minutes, or until most of the  moisture has evaporated.
  4. Add the turkey mince and stir around until the meat looks cooked.
  5. Add the rest of the ragù ingredients to the pot and let it simmer for about 30 minutes; this should be enough time for the cheese sauce.
  6. For the cheese sauce start with a roux; put the olive oil and the flour in a pot and whisk/stir around on a medium-low heat for 5 minutes, or until the mixture just barely starts to darken.
  7. Stirring continuously, add the milk, making sure to only add tiny amounts at the beginning otherwise you risk getting lumps. Once all the milk is in the pot keep stirring until it thickens.
  8. When thickened, turn the heat off, tear the mozzarella in and add the nutmeg and seasoning. Stir until the mozzarella has completely dissolved.
  9. Assembly time: put a small amount of the ragù (about 1/4) to the bottom of a pan and lay over the lasagne pasta sheets; you don’t need to cover the bottom, you just need a bed for the pasta. Lay 1/2 of the remaining ragù over the pasta, cover with pasta, add the rest of the ragù and add the last layer of  pasta. Make sure to dump in the pan all the cooking juices. Finish the assembly by covering the top pasta layer with the cheese sauce.
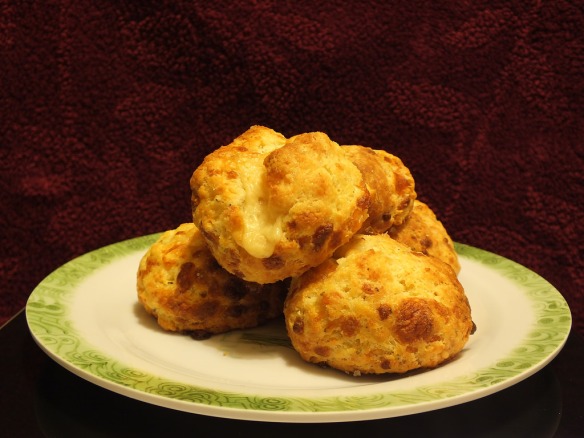
  10. Bake for about 45 minutes, or until you get the brown patches you see in the picture all over the top of the lasagne.

Image

Tips

  • Cooked lasagne freeze really well and they are one of the foods that taste better the next day. I recommend you make a big batch, portion it and freeze for a quick microwave meal; if you don’t have a microwave just defrost and bake until warm through.
  • Different vegetables will also work; ie. peppers, aubergine, courgettes etc.
  • You may have noticed that there is no added oil in the ragù. This is because the chorizo is quite fatty and we rendered some of its fat out. If things start to stick to the bottom of the pan, or decide for some twisted reason to skip the chorizo just add some oil.

Basil and chocolate tart

You probably think I’m crazy for combining basil and chocolate. You’re right, I am crazy but that’s not why. Last week I stumbled upon a cool website (Foodpairing). What this website does is that you can get some neat tree diagrams about different foods that go together. And you’ve guessed it, that’s where I got the basil and chocolate combination from. Before giving the recipe I’m just going to briefly talk about the science behind flavours working well together and how Foodpairing finds these combinations. DISCLAIMER: I am not getting paid by them, or anyone for that matter. It’s just a tool that I found cool and I thought I’d share. 🙂

<Science bit> In general, the flavour profile of a food can be determined using gas chromatography – mass spectometry (GC-MS). Roughly speaking, both of these techniques can tell you what substances make up a material and in what quantities. Gas chromatography focuses on vapors, ie. smells, whereas mass spectometry is more suited for analysing the composition of the actual material. What you end up with these techniques is a straight line with a few peaks (example). Each of these peaks corresponds to a certain set of compounds that are present in the material that is being analysed. Foodpairing uses the GC-MS analysis of a lot of foods to identify similarities in flavour profiles, which you can use to pair foods together. Some of these combinations are well known (ie. orange and chocolate or basil and tomato), whilst others just sound obsurd (eg. chaviar and white chocolate). Bottom line, it’s an easy way of finding successful flavour combinations that no person with a sane mind would ever think of putting together. </Science bit>

I have basically created a free account at Foodpairing and, to my surprise, found that basil should work well with cocoa nibs. I also know that basil and strawberry is a good combination and so is chocolate and strawberry. So, I thought I’d do an experiment, where I’d make a dessert that features these three flavours and see how it goes. The first thing that came to mind was to make a chocolate tart that’s infused with basil and serve it with  a strawberry coulis. This might sound fancy, and a really hard task, but trust me the only slightly technical bit is the pastry, which you can buy pre-made if you’re not feeling up to the task of making your own. In any case, I will give you my recipe for what I consider a perfect shortcrust pastry and the chocolate-basil filling that goes with it.

Chocolate and basil tart

Ingredients

For the pastry:

  • 250g plain flour
  • 150g unsalted butter (cut into small pieces)
  • 1 egg
  • 1 1/2 tbsp icing sugar
  • 1 tbsp cold water

For the filling:

  • 450g dark chocolate (at least 70% cocoa – I used 76%)
  • 450g double cream
  • 15g chopped basil leaves (about 15-20 leaves)

For the coulis:

  • 400g strawberries (stem removed and roughly chopped)
  • 60g sugar
  • 1 tbsp water (helps for not scorching the strawberries but not necessary)

Execution

  1. First we start with the pastry. Put in the flour and butter in the freezer for 20-30 mins. This step helps to make a really flakey crust.
  2. Pulse the chilled flour and butter in a food processor until you get a breadcrumb-like consistency.
  3. Add the rest of the pastry ingredients and pulse until roughly combined. DO NOT OVERWORK IT! If you overwork the dough your pastry will become rock hard. Stop as soon as it starts coming together. It might look dry at first but  it’s probably not. To figure out if it’s got the right amount of moisture just grab some of the crumbs and squeeze them in your hand. If it holds its shape it’s fine, otherwiise just add a few drops of water.
  4. Tip the mixture on a clean surface and form into a disk. Wrap in cling film and refridgerate for about 30 mins.
  5. To roll the pastry out place a large piece of greaseproof paper on your work surface, flour it, put the pastry disk on top and flour that too. Use a rolling pin to roll the pastry until it has the thickness of about 3mm. Half way through rolling add some extra flour to the crust to avoid sticking.
  6. Line a 25cm tart tin with the pastry and get rid of the excess. Prick the bottom several times with a fork to avoid steam building up.
  7. Put a piece of baking parchment over the pastry and fill it with coins! Yes, coins! The traditional method is to use dried beans, but I find that coins are heavier and conduct head much better than beans. Don’t worry about getting poisoned… the coins won’t touch the pastry.
  8. Bake for 15 minutes at 180C, remove the coins and parchment paper and bake for a further 5 minutes or until the base of the crust becomes slightly brown.
  9. Once the pastry is done (you can even make it from the previous day), start making the filling.
  10. In a sauce pan add the cream and basil and bring to a simmer. Let the basil steep for about 5 minutes.
  11. While the cream is simmering, chop your chocolate in a bowl and add the salt.
  12. Once the cream is ready pass it through a sieve to get rid of  the basil and pour it over the chocolate.
  13. Stir until smooth and taste. I personally like my chocolate a bit bitter, so I didn’t need to add any sugar. If that’s too bitter for you just add some icing sugar.
  14. Poor the filling into the pastry and let it cool and set. (if you’re in a hurry put it in the fridge, but make sure to serve it at room temperature!)
  15. The last bit is the coulis. Put all the ingredients in a saucepan and simmer for about 10 minutes.
  16. To get rid of the solids pour the contents of the sauce pan through a sieve using a spoon to extract as much of the juice as possible.
  17. Once the filling had time to set, slice with a hot knife (dip it in hot water and wipe dry) and serve with the coulis.

Image

Tips:

  • If you don’t have a mixer you can also do the pastry by hand. Just  make sure you don’t overwork it and it doesn’t too warm. If the butter starts softening too much put it in the freezer for a few minutes and continue.
  • You can buy pre-made pastry, since the hero is the filling or even make a biscuit base (just like a cheesecake).
  • You can make a raspberry coulis that will work just as good as the strawberries. The recipe is exactly the same, just replace the strawberries with raspberries.

Creamy blue cheese orzo with smoked sausage

It’s been ages since my last post, but now I’m back with a new recipe!

Yesterday I went to a local shop to buy some onions, so I bought a pack of delicious looking sausages to give them a try (don’t worry if it doesn’t make sense… I stopped wondering about my shopping habits myself). It turns out I bought some Zwyczayna polish sausages with pork, beef and venison. I have no clue how to pronounce that word, but at least I can cook them! 😀

I decided to make a play on the traditional Greek/Cypriot Kritharaki, which is orzo pasta cooked in a tomato sauce, typically with some meat and finished with some grated hard cheese.  What I love about Kritharaki is that it is a one pot wonder, it takes about 30 mins to prepare and you can easily make a big batch for the next day or for guests. In this recipe I used the polish sausage as the meat part and finished it off with some Stilton, which I think complements the smokiness of the sausage very well. Of course, I threw in a few spices to pump up the flavours! The following recipe probably serves 4 people.

Kritharaki with Zwyczayna and Stilton

Ingredients

  • 2 Carrots (cut in half-moon slices)
  • 2 Zwyczayna sausages (cut in half moon slices)
  • 60g Stilton
  • 1 medium white onion (finely chopped)
  • 1 clove garlic
  • 1 bay leaf
  • 1/2 tsp paprika
  • 1/4 tsp chilli powder
  • 400g tinned chopped tomatoes
  • 1 1/2 cups orzo
  • 2 1/2 cups chicken stock
  • 1 tbsp tomato paste
  • salt, pepper

Execution

  1. Put the sausage in a pot and turn the heat on to medium.
  2. As soon as the sausage starts getting some colour, add the onions, the bay leaf and a pinch of salt.
  3. When the onions start getting translucent add the carrots, garlic tomato paste, black pepper and paprika.
  4. Cook for 2-3 minutes and add the chopped tomatoes.
  5. Cook for another 2-3 minutes and add the orzo.
  6. Stir around for about a minute and add the chicken stock. You might think that there’s a lot of stock, but trust me, it’s fine! 😀
  7. Bring to a boil, reduce the heat as low as it goes and partly cover. Stir every 5 minutes so that the pasta doesn’t catch on the bottom of the pan.
  8. When you get a creamy risotto consistency (about 15 minutes), turn the heat off, throw away the bay leaf, taste and adjust the seasoning (salt/pepper).
  9. Crumble in the Stilton and stir until mostly melted.
  10. Serve and enjoy!!

Image

Tips:

  • Cheeses usually go in foods at the very end. This is for two reasons: First, the last ingredients that go in the dish are usually the ones you taste first (you don’t want the cheese to disappear). Second, if you overheat cheese it will split (the fat separates from the proteins -> you loose the creaminess you would normally get).
  • Kritharaki tastes better the next day. When you get it out of the fridge it will be a solid block. to loosen it up put it in a pot, add a splash of water and stir occasionally on a medium-low heat.

Tom Yum-my!

As I mentioned in earlier posts, Thai is one of my favorite cuisines and I really enjoy the balanced and complex fresh flavors you get. Perhaps, my all time favorite broth/soup is Tom Yum. Tom yum is a spicy broth with some citrus backnotes and a nice depth of flavor.

It’s usually served with mushrooms, coriander and sometimes prawns. Since I wanted to have this as a meal I turned it to something that resembles ramen, so I served it with noodles, oyster mushrooms, coriander, chicken and carrot. It’s a bit unusual, but it’s ridiculously tasty!!!! The soup is actually good for you and ideal for weight loss. The chili speeds up your metabolism, the ginger has antioxidants, there’s no added fat and it doesn’t taste like “diet food”.  I’m not going to any more detail about the nutrition bits of this recipe.

I really don’t want to drag this anymore… recipe time! (makes 2-3 bowls)

Tom Yum “Ramen” with Chicken

Ingredients:

For the soup:

  • 3 cups of chicken stock
  • 1 1 inch piece of ginger (thinly sliced)
  • 3 chili (roughly chopped – I used birds eye)
  • 2 tsp tamarind paste
  • zest of 1 lemon (use a vegetable peeler 😉 )
  • 1 lemongrass stalk (bruised and roughly chopped)
  • juice of 1/2 lemon
  • 3 chicken legs
  • 2 tbsp light soy sauce
  • 2 tbsp fish sauce

To serve:

  • 1 small bunch of fresh coriander leaves
  • 1 handful of oyster mushrooms
  • a few handfuls of cooked noodles
  • 1 carrot cut julienne

Execution:

  1. To prepare the soup just put all the soup ingredients (apart from the lemon juice) in a pot and bring to a boil and then simmer for 30 mins. Finish with the lemon juice.
  2. Sieve the soup. Keep the chicken legs.
  3. Let the chicken cool enough to handle and shred.
  4. To serve, put the noodles, (roughly tear) mushrooms, chicken, coriander leaves and carrots in a bowl. Ladle in the (HOT) broth until everything becomes just submerged.
  5. Indulge!

Tom Yum

Tips:

  • You can replace the tamarind paste with palm sugar, brown sugar, or even honey. I like tamarind here because it gives a nice tangy flavor.
  • To make it slightly more traditional skip the noodles and carrots. Serve it with prawns instead of chicken.
  • To turn this to tom Khaa just add a splash of coconut milk. This variant is more luxurious.
  • If you choose to use button mushrooms make sure to finely chop them so they cook as soon as you pour the broth over them. I really like oyster mushrooms though because they are quite delicate.
  • If you’ve got leftover liquid you can use it the next day as a stir fry sauce. Just add about a tablespoon of cornflour to help it thicken a bit before adding it to the pan (or wok).

Banana Ketchup

I know, this sounds weird but it’s actually a popular condement in the Philipines! The first time I heard about it was about a year ago, and believe me I was really surprised. Then, after giving it a bit of thought it kind of made sense in my head. I never tasted it though.

A bit over a week ago I was chatting at the dinner table of an academic symposium I attended about unusual foods. I mentioned banana ketchup and, just as I expected, a few people were weirded out. So I said that I would make a batch and get the recipe on my blog if it was successful. The next day, I did a bit of recipe browsing online and came up with my own variation. The result turned out quite good, but it is an acquired taste. It reminded me of a sweet brown sauce minus the smokiness. I’ve got no idea if that’s how banana ketchup is supposed to taste like, since it’s the first time I have it, but it’s surprisingly good with meats.

Here’s my recipe!

Banana Ketchup

Ingredients:

  • 3 very ripe bananas
  • 1/2 tsp tumeric
  • 1 tsp paprika
  • 1 tsp allspice
  • 1/4 tsp nutmeg
  • 1/4 tsp cumin
  • 2 cloves
  • 1 tbsp tomato paste
  • 2 tbsp soft brown sugar
  • 2 tbsp light soy sauce
  • 1/4 cup vinegar (I used sherry)
  • 1 tbsp vegetable oil
  • 3 cloves garlic
  • 1 onion
  • 1 chilli

Execution:

  1. Roughly chop all the “choppable” ingredients (bananas, garlic, onion, chilli.
  2. In a sauce pan add the oil, garlic and onions. Sweat off intil the onions soften.
  3. Add the tomato paste, spices and cook off for 1 minute.
  4. Add the rest of the ingredients, cover and cook on a low heat for 30-40 minutes.
  5. Throw away the cloves and blend until smooth.
  6. Let it cool to room temperature and store in the fridge for upto a month.

Chicken with banana ketchup

Tips:

  • The best way to store this is in a glass jar or bottle. Specifically, get your jar and its lid (NOT SCREWED ON) and fully immerse it in a pot of hot water. Bring to the boil and remove after a few minutes. This way the jar is sterilised and will ensure that your ketchup (or whatever else you want to put in it – eg. marmelade) lasts considerably longer.
  • If you don’t have a blender just finely chop the onion and garlic. It should turn out just fine.